How to make a racing game
Build a racing game from a kart starter, set its laps, then test driving, checkpoints, finish and restart.
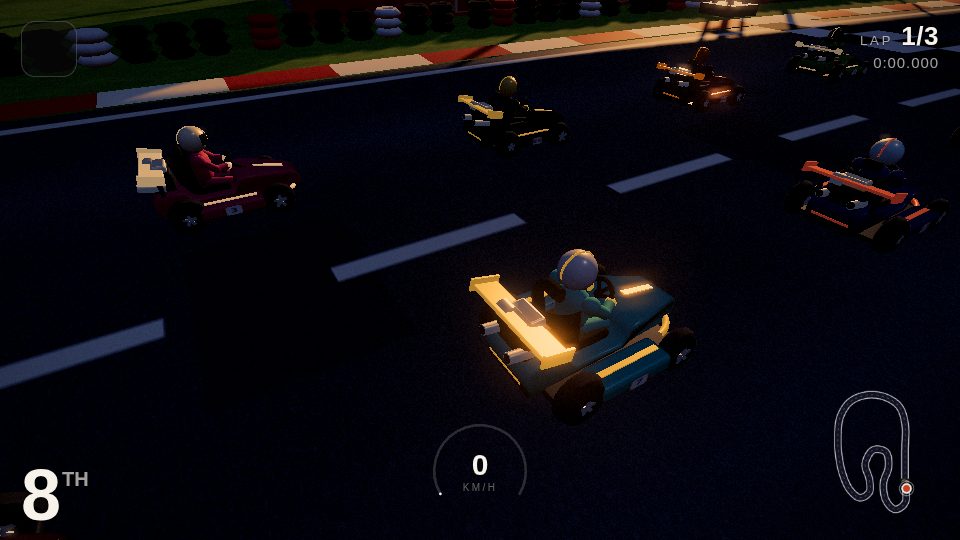
Amberline Sprint · 1 lap · 8 karts · finish in the top three. W accelerates; A/D steers.
1. Build the racing starter
Already installed the kit? Run these commands from the kit folder.
npm run new -- s7-racing --from=starters/racing
npm run build -- --game=games/s7-racingYou copy the kit’s racing starter into a new game. Amberline GP already has a hillside circuit, eight karts, items, drifting and a three-lap event. It also has a title screen, countdown and a finish result. Copy it before editing so the original remains available for comparison.
After installing the kit, run these commands from a working copy of its root folder. The game goes into games/s7-racing/, and its built file appears in dist/index.html. We ran both commands on 20 November 2026; the original build was 1,066,368 bytes and passed the size check.
The game above is the rebuilt one-lap version, Amberline Sprint. It uses the same track and racers.
2. Shorten the race to one lap
You set laps: 1 in src/game/config.js and src/game/track.js. Keep difficulty: 'normal' and winPlace: 3. The first setting chooses rival skill; the second means a top-three finish wins. Update the title in the config and index.html, and change the displayed lap wording to one lap.
The worked edit changes race length without changing how far the kart turns or how quickly it accelerates. That gives you one variable to compare. Paste this into Claude Code to request the same bounded change:
Use the racing starter to make Amberline Sprint, a one-lap practice race. Keep the existing circuit, eight racers, normal rival difficulty, drift boosts and items. Set laps to 1 in the game config and track definition, keep winPlace at 3, and update the title and lap wording. Build the single HTML file. Check countdown, steering, drift, item use, checkpoints, finish and restart with real input. Keep all bundled notices.3. Learn the driving controls
You drive the existing circuit before reshaping it. W or Up accelerates; A/D or Left/Right steers; S or Down brakes and then reverses. Space or Shift hops. Hold that control while steering to drift and release it for a mini-turbo. E, Ctrl or Enter uses the held item, and Q looks back. M mutes the audio.
The countdown also has a rule worth testing: holding throttle throughout it causes a spinout, while pressing shortly before GO can give a launch boost. On touch screens, the kart accelerates automatically after GO; use the steering, DRIFT and ITEM buttons. The starter has gamepad input too. MDN’s Gamepad guide explains browser connection and polling; test an actual controller before changing its mappings.
4. Keep the route and finish valid
You preserve the track while testing the lap change. The circuit’s control points, widths, boost pads and item rows live in src/game/track.js. The starter’s centerline uses a smooth curve through 3D points. Three.js documents that curve, including its closed-loop setting. A road can look connected while its timing logic still needs a complete ordered route.
The actual race manager checks checkpoints in order before counting a finish-line crossing. Our test supplied the same sequence of positions to the three-lap and one-lap rules. They finished after 480 and 160 updates respectively. A separate check put the kart back at the finish without the intervening route; it did not finish. These are state-machine checks with supplied positions, not recorded driving times.
5. Rebuild and playtest
You build after saving the config and track files. Our final compilation took 13.81 seconds. With notices and its indexing tag included, the downloadable file is 1,067,567 bytes. That measures a local build; a Claude session’s usage is billed according to your account. Open the commands, build timings and rule-check results.
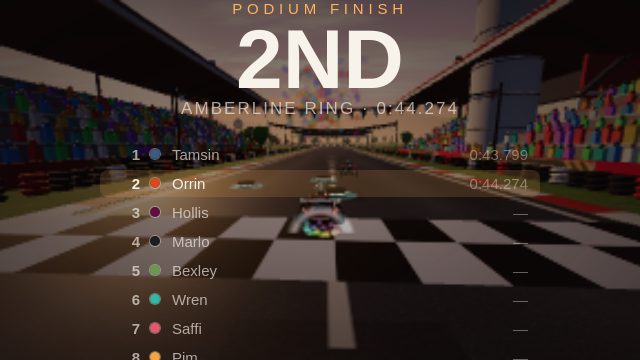
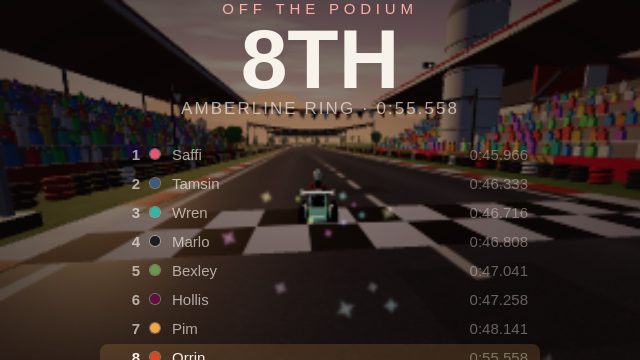
We accelerated, steered into a drift and used a held item with E in WebKit. The game’s test driver used the same input system to complete a podium finish and a finish outside the top three. Read the checkpoint and restart results.
npm run build -- --game=games/s7-racing
npm run playtest -- --game=games/s7-racingDrive the same checks yourself. After each finish, restart and look for the countdown, lap one, your starting position and an empty item slot. Use ?q=low for the lighter graphics setting.
6. Play and change the result
You open the finished HTML before adding scenery. Play Amberline Sprint in a full tab or download it above. The file includes its required notices. Test the exact file you intend to share, including touch steering and mute. After the race works, use racers.js for the roster and look.js for lighting and dressing.
For a new track, keep corners separated so their roads and barriers do not overlap. Adjust a few control points, rebuild, and drive the whole circuit. Keep original names and art, and retain the licences for anything you import. The $29-a-year kit includes the racing starter, other genres and asset packs; Claude access is separate. For another first project, the beginner guide starts with a smaller browser game.
Questions
How do I make a racing game?
Start with a drivable vehicle, a track, ordered checkpoints and a finish condition. This guide uses the kit's racing starter, changes its three-lap event into one lap and builds the resulting game as a single HTML file.
Can I make a racing game with AI?
Yes. Ask Claude Code to make a specific change to a running racing starter, then build and test the result. The worked prompt keeps the circuit and eight karts fixed while changing the race length and title.
How do racing-game checkpoints work?
Checkpoints record progress around the course in order. The finish line counts a lap only after the required progress. In this starter, simply returning to the line without the intervening checkpoints does not complete the race.
How do I add drifting to a racing game?
This starter already includes a hop-and-drift control. Hold Space or Shift while steering, then release for a mini-turbo. Keep the track fixed while tuning drift behavior so you can compare the same corner before and after.